Hey there, I’m Jake, and for the last 12 years, I’ve worked directly with industrial air coolers—spending most days troubleshooting client headaches, walking plant floors, and answering the same question over and over: “Why is my cooler blowing stale, dusty air even after I ‘cleaned the filters’ last week?” Industrial Air Cooler
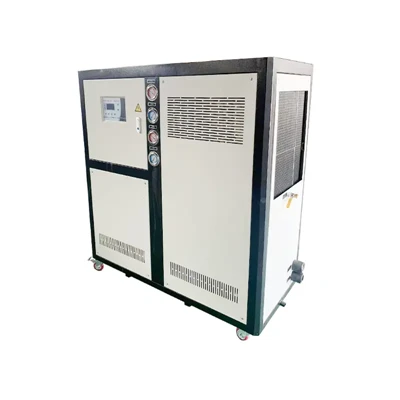
I get it. When you run a factory, warehouse, or large commercial space, industrial air coolers aren’t just a “nice-to-have”—they keep production lines running, your team from overheating, and even protect sensitive equipment from heat damage. The number one thing keeping that cooler running smoothly? The filters. Skip proper maintenance, and you’re wasting energy, pushing poor air quality, and risking a costly breakdown.
This post is the same step-by-step process I walk every client through when they call panicking about their cooler underperforming. It’s rooted in real-world fixes (not just textbook theory) and works for every industrial air cooler we supply, no matter what size or model you have. No fluff, no jargon—just what you need to do, when to do it, and when to call in backup.
First, Let’s Talk Why This Is Non-Negotiable
Before we jump into cleaning, let’s set the stakes. I’ve seen clients cut corners on filter maintenance and end up with a mess:
- Energy bills skyrocketing: When filters are clogged, the cooler’s fan has to work 30-50% harder to pull air through, which cranks up electricity costs. Last year, a local metal fabrication plant skipped monthly cleans for 3 months, and their electric bill jumped $1,200—all just because a $40 filter was covered in metal shavings.
- Product damage: For food processing, pharmaceutical, or electronics facilities, fine dust, lint, or chemical particulates blowing out of the cooler can ruin batches, contaminate sensitive components, or violate industry health codes. A cheese factory I worked with had to throw out 2 pallets of product last year because unfiltered air blew mold spores onto aging cheese wheels.
- Filter lifespan plummeting: A dirty filter that’s just “blasted off” with compressed air wears out 2-3 times faster than one properly cleaned and maintained. That means more frequent, expensive filter replacements, not to mention unplanned downtime.
What You’ll Need Before You Start
I always tell my team to give clients a “maintenance toolkit” list—no fancy gear, just stuff you probably already have or can grab from a local hardware store:
- PPE: Nitrile gloves (filters are grimy, sharp-edged, and can carry mold), safety goggles (dusty filters kick up particles), and a dust mask or N95 respirator (critical if you’re working with metal dust, chemicals, or food-grade debris). Skip the paper masks—they won’t stop fine particulates.
- Tools: A flathead screwdriver or Allen wrench (most coolers use these to access the filter compartment), a soft-bristle nylon brush (stiff metal brushes scratch filter media, ruining it), a wet/dry vacuum with a HEPA filter (regular vacuums blow dust back into the air), and a bucket of warm, mild dish soap (no harsh chemicals—they can break down filter materials).
- Optional, but helpful: Compressed air (max 50 PSI—high pressure tears filters) and a clean towel for drying.
Step 1: Turn Off Power, Lock It Out (This Is Non-Negotiable)
I can’t stress this enough—this is the step that keeps people safe. Never work on an industrial air cooler while it’s plugged in or powered on. Even if you think it’s off, a stray wire or a misaligned switch can cause the fan to lurch. Here’s how to do it right:
- Locate the cooler’s main electrical disconnect (it’s usually a metal box mounted near the unit, on the wall or base).
- Turn the switch to the “Off” position.
- Attach a lockout/tagout device (even a simple padlock with a note that says “Maintenance in Progress”)—this keeps anyone else from flipping it back on while you work.
- Wait 5 full minutes after turning off power. The fan and pump in most industrial coolers hold a small residual charge, and this ensures they stop completely.
Step 2: Locate and Access the Filter Compartment
Filters in industrial air coolers aren’t like the little round ones in your home AC—they’re big, rectangular, and housed in a sealed compartment to keep unfiltered air out. The access panel is usually on the side of the cooler, sometimes on the front or back.
- If you’re working with a rooftop cooler: Climb up carefully, use a sturdy ladder, and make sure the area around the base is clear (no tools lying around to avoid falls).
- If it’s a ground-mounted unit: Most are at waist height, so it’s easier to access, but still watch your step if there’s standing water around the base.
Once you find the panel, remove the screws or latches. Be gentle—some older coolers have plastic panels that crack if you force them. You’ll know you’re in the right spot when you see the filter: it’s a thick, usually gray or white mesh or foam mat, stretched in a frame, with a mesh backing on the air inlet side (that’s the side that faces outside, pulling air in).
Pro tip: Before you yank it out, take a quick photo with your phone. That way, if you accidentally drop it or misplace a small part, you can match the filter back up exactly. I’ve had clients call me panicking because they put the filter in backwards—air flow drops 20% when that happens.
Step 3: Inspect the Filter First (Don’t Jump Into Cleaning)
You don’t need to clean a filter that’s only got a little dust on it. Take 2 minutes to check its condition to save time and money:
- Light dirt (daily/weekly touch-up): If you hold it up to the sun and can see light through most of it, and it’s just covered in surface lint or light dust, a quick vacuum will do.
- Moderate dirt (monthly deep clean): If you can’t see light through half the filter, or it’s caked with dust, small particles, or grime along the edges, a wash is needed.
- Too dirty to save (replace it): If the filter has tears, holes, mold growth (dark spots or a musty smell that doesn’t go away when you clean), or if it’s been cleaned 3-4 times already, throw it away. Trying to clean a damaged filter will do more harm than good—you’ll lose filtration efficiency and risk blowing debris through the cooler.
A good rule of thumb: If a filter is more than 6 months old, even if it looks fine, go ahead and replace it. Most industrial filters have a 3-6 month lifespan, depending on your environment. If you’re in a high-dust area (like a sawmill or construction zone), that timeline drops to 1-2 months.
Step 4: Clean the Filter (The Correct Way—No Shortcuts)
This is where most people mess up. I’ve seen guys blast filters with a leaf blower, scrub them with steel wool, and even pressure wash them. None of that works, and all of it ruins the filter. Here’s the right method, broken into two parts: dry cleaning for light dirt, wet cleaning for heavy grime.
Dry Cleaning (For Light, Surface Dirt)
This is what I recommend for weekly touch-ups, especially if your cooler is running most days:
- Hold the filter over a trash can or outdoor area (not inside, unless you want dust everywhere).
- Use the HEPA wet/dry vacuum to gently suction dirt from the air outlet side (the side that faces the inside of your facility, pushing air out). Wait—vacuum from the outlet, not the inlet? Yes! If you vacuum from the inlet, you’ll push dust deeper into the filter, and it’ll just end up in your cooler’s internal parts.
- If there are any stubborn clumps of dust, use the soft nylon brush to lightly dislodge them, then vacuum them up. Don’t press too hard—you’ll bend the filter media and create gaps where dirt can get through.
Wet Cleaning (For Moderate, Caked-On Dirt)
Do this when dry cleaning doesn’t get it all—usually once a month for most facilities:
- Fill your bucket with warm water (not hot—hot water can shrink foam filters) and a tiny bit of mild dish soap. Mix it up so it’s sudsy, not slippery.
- Submerge the filter fully in the soapy water. Gently agitate it with your hands for 1-2 minutes—don’t rub or scrub, that damages the filter media.
- Rinse the filter thoroughly with clean, cool water. Make sure all soap is gone—leftover soap will leave a residue that attracts more dirt, making your next clean even harder.
- Let the filter air dry completely. This is the most skipped step! If you put a damp filter back in the cooler, mold will grow inside the sealed compartment, and that’ll contaminate your air. I always tell clients to leave it in a well-ventilated area for 24 hours—no rushing this. If you’re in a hurry, pat it dry with a clean towel, but never use a hairdryer or high heat—heat breaks down filter materials.
Pro shortcut for wet cleaning: If you have access to a low-pressure garden hose (keep it on the “shower” setting, no jet spray), you can rinse the filter outside instead of a bucket. Just be careful not to aim the hose directly at the filter—hold it at an angle, 6 inches away, to avoid bending the media.
Step 5: Reinstall the Filter and Test the Cooler
Once your filter is clean and dry (or you’ve replaced it), it’s time to put it back. This is simple, but one small mistake can undo all your work:
- Align the filter frame exactly how it was when you removed it—use that photo you took earlier if you’re unsure. The mesh backing (air inlet side) should face outside, pulling air in.
- Secure the access panel back in place with the screws or latches. Don’t overtighten—you’ll strip the plastic or metal.
- Go back to the electrical disconnect, turn the lock out/tag off, then flip the power back on.
- Let the cooler run for 10 minutes, then check the air coming out. It should be cool, free of dust, and flow evenly across your space. If it still smells or looks dirty, double-check that the filter is installed correctly, or that you didn’t miss a layer (some industrial coolers have a pre-filter and a main filter—don’t forget the pre-filter if you have one).
How Often Should You Clean These Filters?
This is the question I get most, and it depends entirely on your environment. Here’s the rough guide I give every client:
- Light-use facilities (offices, retail spaces, moderate dust): Clean filters every 3 months, replace every 6 months.
- Medium-use facilities (warehouses, auto shops, low to moderate dust): Clean filters every 1-2 months, replace every 3-4 months.
- Heavy-use facilities (manufacturing, construction zones, food processing, high dust): Clean filters weekly, replace every 1-2 months.
If you’re not sure, do a quick check every month: hold the filter up to the sun. If you can’t see through it when it’s clean, that’s your cue.
When to Call for Backup (And It’s Not Just For Repairs)
I’m not here to tell you to fix every problem yourself—sometimes a filter is just the symptom of a bigger issue. Call our team if you notice any of these:
- Mold or a persistent musty smell coming from the cooler, even after multiple filter cleans. That usually means mold has grown inside the cooler’s water sump or internal ducts, which is not something you can fix with a filter wipe-down.
- The cooler is running louder than usual, or blowing uneven air. A clogged filter is a common cause, but if that’s not it, there might be a fan issue or blockage in the ductwork that needs a pro to diagnose.
- You’re going through filter replacements faster than the timeline above. That could mean your filter size is wrong for your cooler, or you have a leak in the compartment that’s letting extra dirt in—we can help you adjust that.
Closing: It’s All About Consistency, Not Perfection
Look, industrial air cooler maintenance isn’t complicated. It’s just about sticking to a routine, taking the time to do it right, and not cutting corners. Over the years, I’ve seen the clients who spend 15 minutes on filter maintenance every week save thousands on energy bills, avoid product damage, and keep their teams comfortable year-round.
If you’re dealing with a cooler that’s underperforming, unsure about filter specs for your unit, or just want a tailored maintenance plan for your facility, we’re here to help. We don’t just sell industrial air coolers—we back them up with support that lasts, so you don’t have to stress about downtime. Reach out to our team to discuss your needs, and we’ll walk you through exactly what you need.
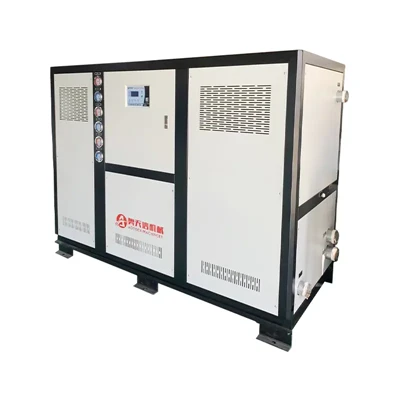
And one last tip: Don’t wait until your next big shutdown to check your filters. A 10-minute filter clean today can prevent a $10,000 unplanned breakdown tomorrow.
References
Chiller Unit ASHRAE. (2021). Ventilation for Acceptable Indoor Air Quality. American Society of Heating, Refrigerating and Air-Conditioning Engineers.
OSHA. (2022). Safety Guidelines for Maintenance of Industrial HVAC and Cooling Systems. Occupational Safety and Health Administration.
Manufacturing Engineer’s Association. (2020). Best Practices for Industrial Air Filtration and Cooler Maintenance. National Association of Manufacturers.
Kunshan Aotianxin Machinery Co., Ltd.
We’re well-known as one of the most reliable industrial air cooler manufacturers in China. With abundant experience, our factory offer high quality industrial air cooler made in China with low price. If you have any enquiry about quotation and free sample, please feel free to email us.
Address: 550 Shengguang Road, Bacheng Town, Kunshan City, Jiangsu Province
E-mail: 1516722561@qq.com
WebSite: https://www.atxks.com/
